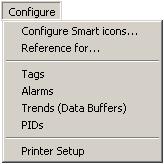
The Configure pull-down menu allows you to configure various features of ONSPEC, such as Tags, Alarms, Data Buffers (Trends), and Control Blocks (PID’s) as well as printer and Smart Icon setup.
Configure Smart Icons...


This feature allows the user to create and modify the Smart Icon sets. The Smart Icon bar is located directly below the menu bar. The Smart Icon bar shows a configurable list of Smart Icons.

A Smart Icon is a button that, when pressed, executes a specific action. The button face typically displays a picture that describes the action to be performed when pressed. It is designed to quickly and easily execute a pull-down menu option.
If you don't know what a Smart Icon does, you can quickly find out by clicking and holding the right mouse button on it. The title bar will describe the smart icon until you release the mouse button
You can have more than one Smart Icon set. You can select another Smart Icon set by selecting the Next Smart Icons option in the Commands pull-down menu. You can also use the Select Tools Smart Icon to pick from a list of sets.
Smart Icon sets for Onspec are given the filename extension .SIO.
The following lists the buttons in the Smart Icon Configurator along with the functions they perform:
Customize
When this option is selected you will be presented with a dialog box with a list of all of the available smart icons as well as a list of the smart icons currently being used.
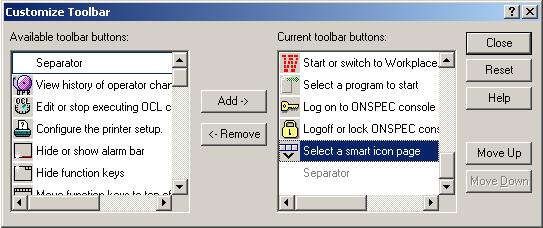
The Available toolbar buttons list box contains all the icons usable by ONSPEC along with a description of what function they perform. The Current toolbar buttons list box contains the icons that are configured in the current .SIO file (shown in the Smart Icon Configurator title bar above).
To Add a smart icon to ONSPEC, highlight the desired smart icon in the Available toolbar buttons list box and click on the Add -> button.
The icon will be added to the Current toolbar buttons list after the currently selected icon.
To Remove a smart icon from ONSPEC, highlight the desired smart icon in the Current toolbar buttons list box and click on the Remove button.
Save
Saves any changes made to the current icon set since the last Save to disk. If the current icon set has not yet been named, the Save function acts like the Save As function. The file extension used is .SIO.
Save As
Saves the current smart icon set to disk as a new filename. The file extension used is .SIO.
Load
Retrieves from disk a previously configured icon set. The file extension used is .SIO.
Close
Exits the Smart Icon Configurator dialog box. The current configuration is immediately loaded as the current smart icon set.
Help
Pressing the Help button starts the ONSPEC Help program. Configure Smart Icons is the active topic, however, all help topics are available.
Reference For...
The Reference For option allows you to retrieve a cross-reference for a specified ONSPEC tag. When you select this option you are presented with a Tag List dialog.
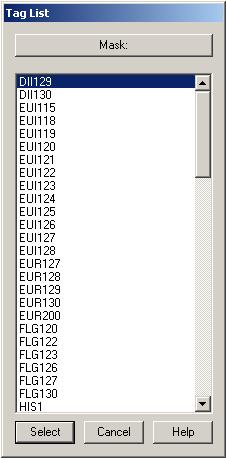
Select the tag for which you would like the cross-reference information. This will present a dialog generated by ONConfig. This dialog shows all places the selected tag is used in the current ONSPEC configuration.
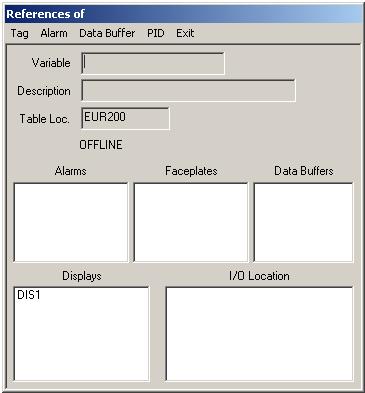
From the References of dialog you can add, modify, or delete ONSPEC configuration components.
Tags

Opens a Tags View window which shows all the Tags for the current ONSPEC configuration. You can Add, Modify, and Delete Tags from this window. In ONConfig, the same information can be found using the Tags... option from the View All pull-down menu.
Alarms

Opens an Alarms View window which shows all the Alarms for the current ONSPEC configuration. You can Add, Modify, and Delete Alarms from this window. In ONConfig, the same information can be found using the Alarms... option from the View All pull-down menu.
Data Buffers (Trends)

Opens a Data Buffers View window which shows all the Data Buffers for the current ONSPEC configuration. A Data Buffer is a short term history collector that gathers data from an assigned ONSPEC Table Location at a defined sample rate. Each Trend displayed in ONSPEC has an associated Data Buffer. You can add, modify, and delete Data Buffers from this View window. In ONConfig, the same information can be found using the Data Buffers... option from the View All pull-down menu
PIDs

Opens a Control Blocks window which shows all the control blocks for the current ONSPEC configuration. You can add, modify, and delete control blocks from this window. In ONConfig, the same information can be found using the PIDs... option from the View All pull-down menu.
Printer Setup

The Printer Setup option allows you to assign and configure a printer for ONSPEC display printing. When this option is selected you are presented with a dialog showing a list of all available printers.
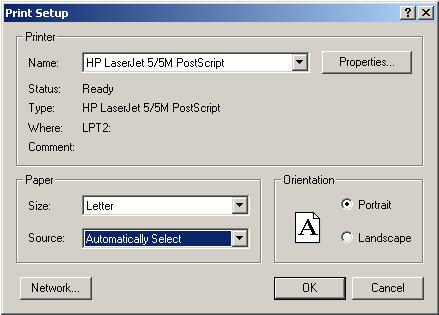
The Properties button presents a dialog box which allows you to configure certain features of the currently selected printer, such as paper size and orientation. The Properties dialog is presented by the printer device driver and may appear different for each printer selected.