
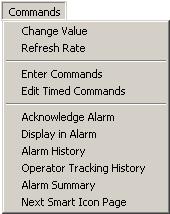
The Commands pull-down menu contains various commands that an operator may wish to issue. You can also add up to nine extra commands to this menu (see Adding Your Own Commands). The following paragraphs explain how to use each of the commands in this menu along with showing the smart icon associated with the command.
Change Value

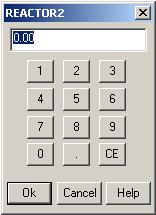
The Change Value command allows you to change an ONSPEC tag value. If a changeable object (smart symbol or primitive with dynamics) is selected on the current display the change dialog for that object will be presented allowing you to change the value.
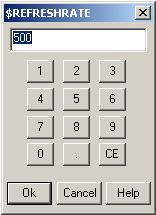
This is a number pad (or calculator type) change dialog for the ONSPEC demo tag REACTOR2. See the ONBuild User Guide for more information about change dialogs.
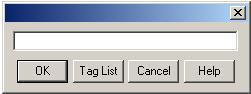
If no object is selected on the current display you will be presented with a change value dialog where you can enter the name of a tag to change. This can be the actual tag name or the ONSPEC table name and index. If you are not sure about the tag name of a point you can press the Tag List button to get a list of all points being used in the ONSPEC system.
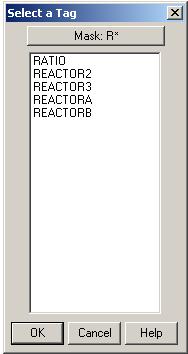
This is a Tag List dialog showing tags for the ONSPEC Demonstration. From this list a tag can be selected to fill in the entry field in the change value dialog.
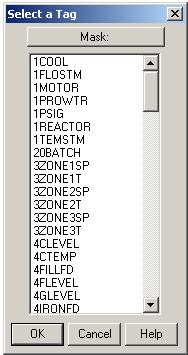
Note: The Tag List is built from the ONConfig cross-reference file (ONCONFIG.CRF). If the Tag List does not seem correct you may wish to rebuild the cross-reference from ONConfig. See the ONConfig User Guide for more information.
If there are several tags you can set a mask to shorten the list. For example if you wanted to see only tags that begin with “R” you could set a mask of R*.
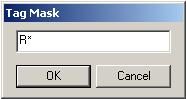
The following list would be produced if the mask was set to R*.
Once a tag has been selected and OK is pressed in the change value dialog, the value will be changed. For digitals the value is changed to the opposite state. For analog values a number pad dialog is presented for changing the value.
Refresh Rate

The Refresh Rate command allows you to change how often ONSPEC will check the objects on the current display to see if they need to be redrawn.
When you select this command a number pad dialog will be presented allowing you to change the refresh rate. The rate is entered in milliseconds. The default refresh rate is 1000 milliseconds (one second) and the minimum is 100 milliseconds and the maximum is 100000 milliseconds.
The refresh rate will affect the CPU utilization. With this in mind you may wish to increase the refresh rate for displays with several objects that can change.
Enter Commands (Execute Commands)

The Enter Commands command allows you to execute OCL (ONSPEC Command Language) commands. When this option is selected you are presented with a dialog with a transcript window where you can enter the commands you wish to execute. The transcript window is a mini editor where commands can be typed, tested and run.
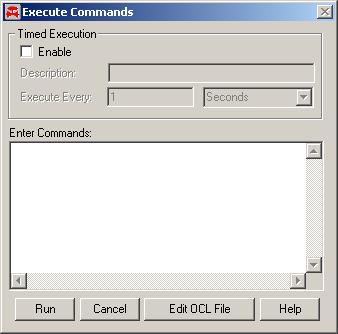
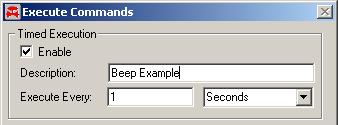
Above the transcript window is the optional Timed Execution section which allow the commands in the transcript to be executed continuously (explained later).
If you press the right mouse button while in the editor, a menu will pop-up with the options available for the editor.
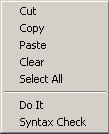 Cut
Cut
Deletes the selected text and stores it in the clipboard where it can be retrieved at a later time. To select text hold the left mouse button down while moving the text input cursor. This function can also be accomplished by pressing the X key while holding down the CTRL key.
CopyCopies the selected text to the clipboard without effecting the text. This function can also be accomplished by pressing the C key while holding down the CTRL key.
PasteInserts text from the clipboard at the current text input cursor position. This function can also be accomplished by pressing the V key while holding down the CTRL key.
ClearDeletes the selected text (does not store text). This function can also be accomplished by pressing the DELETE key.
Select allSelects all of the text in the editor. You can then perform some action on this text. (For example, you could copy all the text to the clipboard or do a Check Syntax.)
Do itExecutes the selected text if it successfully passes the syntax check; otherwise, a message box will appear giving the approximate line number of the error.
Check SyntaxChecks if the selected text is free of errors which would cause it not to execute. If an error occurs during the syntax check a message box will appear showing the approximate line number of the error.
To Run the OCL commands and close the transcript window press the Run button. This can also be done by pressing the R key while holding down the ATL key.
The commands in the transcript window file are executed once when the Run button is pressed. To run the commands multiple times use the Timed Execution option. This gives you the ability to execute the commands in the OCL file on a timed basis.
When the check box is enabled you can set to execute every:
- 100 - 10000 Milliseconds
- 1 - 10000 Seconds
- 1 - 10000 Minutes
- 1 - 10000 Hours
- Each Display Refresh. (Based on display refresh rate, see Refresh Rate.)
A description field is provided for timed executions. This allows you to identify the commands for later editing of halting. (See Edit Timed Commands.)
Edit Timed Commands

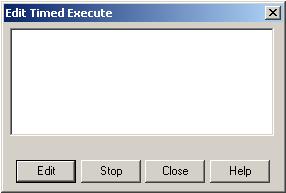
The Edit Timed Commands command allows you to edit or stop timed OCL commands started with the Run OCL File or the Enter Commands option or with the exeFile OCL function. When this command is selected you are presented with a dialog showing a list of the currently executing commands.
The list displays a description of the commands executing. This is the description entered if the commands were started with the Enter Commands option or the file name if the commands were started with either the Run OCL file option or exeFile function. Following the description is the interval at which the commands are being executed.
To stop the commands executing select the appropriate line from the list of running commands and press the Stop button.
To change the commands executing select the appropriate line from the list of running commands and press the Edit button. This will present the Execute Commands dialog (see Enter Commands) with the transcript and timed options filled in. Make any changes you wish to occur and then press the Run button.
Acknowledge Alarm

Allows you to acknowledge an alarm condition. This generates a message which is sent to the alarm history file and can be displayed in the Alarm Bar window.
Select the file you wish to edit from the file list or type the name of a file into the Open Filename entry field.
All alarms associated with the current display are acknowledged. If you are currently viewing the Alarm Summary, all alarms can be acknowledged.
Three options affect the acknowledging of alarms: (see ONConfig – ONSPEC Initialization for setting these options)
ACK DIA
If this option is enabled, when the acknowledge alarm command is issued and no alarms are associated with the current display, a Display in Alarm command is issued.
If this option is disabled no action will occur if no alarms are associated with the current display.
ACK ON
If this option is enabled alarms remain in the Alarm Summary until they have been acknowledged, regardless of the condition of the point that caused the alarm to occur.
If this option is disabled alarms are removed from the summary when return to an “OK” condition.
SUM ACK
If this option is enabled, all alarms can be acknowledged from the Alarm Summary with a single acknowledge command.
If this option is disabled an acknowledge command issued while viewing the Alarm Summary causes a Display in Alarm command to be issued.
Display In Alarm

Allows you to view the display associated with the most recent alarm. See ONConfig – Configuring Alarms for information on associated display.
Alarm History

Allows you to view the history of alarms. This option brings up display 998. This is a reserved display which has been preconfigured to show alarm history lines.
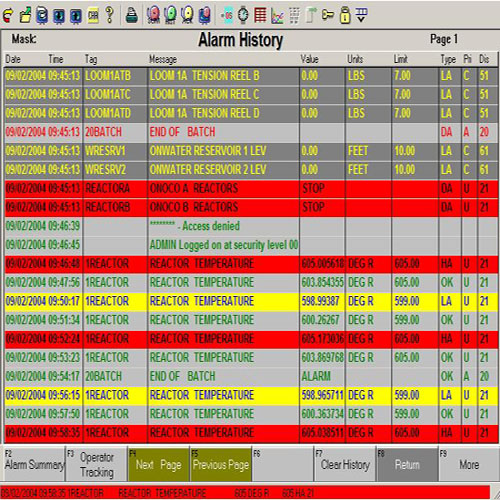
You can page back and forth through history using the predefined function keys or the Page Up and Page Down keys.
The alarm history display is generated from the alarm history file (ALARMH.IBM). This is a circular file which stores the last 2048 alarm messages for viewing through ONSPEC.
The Clear History function key deletes all of the information stored in the ALARMH.IBM file and clears the alarm history display.
You can limit the display of alarms to any combination of the five zones using the $ZONE OCL variables. Setting the $ZONE variables limits the alarms shown on Alarm History, Alarm Summary, and the Alarm Bar. See ONSPEC Command Language for more information on $ZONE variables. See the ONConfig User Guide for more information on zones.
Note: Each line of the display is a Text Primitive with Dynamics on a HISn where n is an offset into the current alarm page. The alarm page is set with the OCL variable $ALARMPAGE, this along with the OCL variable $ALARMINC determines the alarm history record to display on the line. For more information on primitives and dynamics see the ONBuild User Guide. For more information on OCL see the ONSPEC Command Language User Guide.
Operator Tracking History

Allows you to view the history of operator actions. This option brings up display 997. This is a reserved display which has been preconfigured to show operator tracking lines.
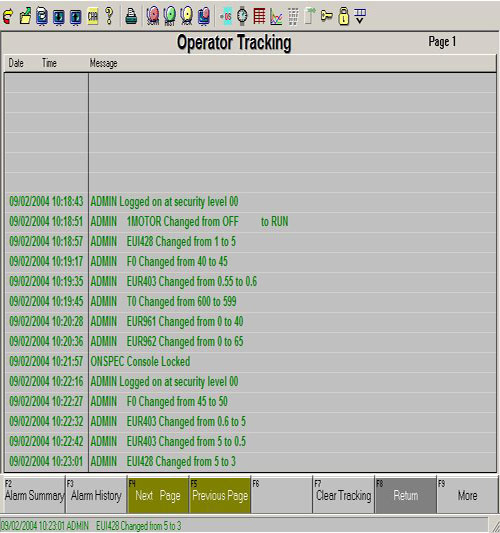
You can page back and forth through the history using the predefined function keys or the Page Up and Page Down keys.
The operator tracking history display is generated from the tracking history file (TRACKH.IBM). This is a circular file which stores the last 10000 operator tracking messages for viewing through ONSPEC.
The Clear History function key deletes all of the information stored in the TRACKH.IBM file and clears the operator tracking history display.
To enable Operator Tracking use the track OCL function, for more information see ONSPEC Command Language.
Note: Each line of the display is a Text Primitive with Dynamics on a TRAn where n is an offset into the current alarm page. The alarm page is set with the OCL variable $ALARMPAGE, this along with the OCL variable $ALARMINC determines the alarm history record to display on the line. For more information on primitives and dynamics see the ONBuild User Guide. For more information on OCL see the ONSPEC Command Language User Guide.
Alarm Summary

Allows you to view the summary of alarms. This option brings up display 999. This is a reserved display which has been preconfigured to show alarm summary lines.
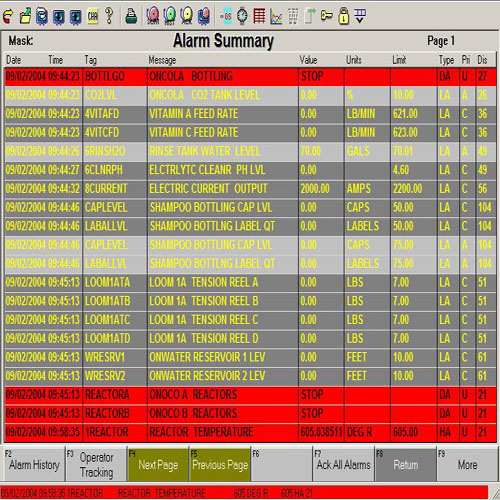
The Alarm Summary displays messages for the current points in alarm.
From this display you can acknowledge all alarms (depends on SUM ACK see Acknowledge Alarm).
You can view the display associated with an alarm by double clicking with the mouse, on the line for that alarm in the summary display.
You can page back and forth through the summary using the predefined function keys of the Page Up and Page Down keys.
Note: Each line of the display is a Text Primitive with Dynamics on a SUMn where n is an offset into the current alarm page. The alarm page is set with the OCL variable $ALARMPAGE, this along with the OCL variable $ALARMINC determines the alarm history record to display on the line. For more information on primitives and dynamics see the ONBuild User Guide. For more information on OCL see the ONSPEC Command Language User Guide.
Next Smart Icon Page

The Next Smart Icon Page displays the next Smart Icon set (.SIO) file, replacing the Smart Icons currently shown beneath the pull-down menus. Repeatedly selecting this option cycles through the Smart Icon set files. The cycling order is the order the .SIO files appear on the disk. The Show Smart Icon Bar option must be enabled in order to see any Smart Icon sets. Smart Icon sets are created with the Configure Smart Icons feature in the Configure pull-down menu.
Adding Your Own Commands
You can add your own commands (up to nine) to the Commands pull-down menu using OCL files.
By creating a file, COMMANDS.MNU, you can add any series of OCL commands to the Commands pull-down menu. The syntax for the COMMANDS.MNU file is as follows:
Where command title is the text which will appear in the menu. OCL filename is the name of a file of OCL commands. The menu shown to the left was created using the following example
COMMANDS.MNU file:
- ~Beep1,beep1.ocl
- Beep2,beep2.ocl
- Beep3,beep3.ocl
- Bee~p4,beep4.ocl
An optional tilde (~) symbol used in the command title will cause the character following the tilde to be underlined. This underlined character specifies the key to press with an ALT sequence to execute the command.
If the syntax of the OCL commands is incorrect or the file does not exist in the default directory the item will not appear in the menu.
Note: You should use the ONSPEC OCL editor to check the syntax of your OCL script to be sure it will execute correctly.